1. Check the version of Oracle database using the command below:
SELECT version FROM V$INSTANCE

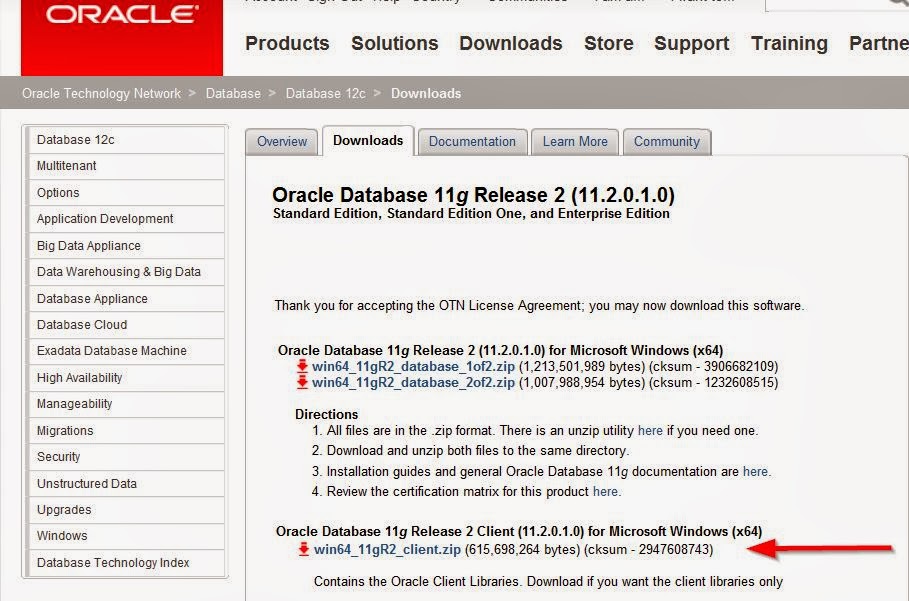
2. Download & install database client for this version from Oracle's website. Note: Please install "full client" as not doing so may have issues when trying to import tables into RPD from Oracle database. You may get error in AdminTool Log file as below:[2014-01-17T14:51:46.000-05:00] [OracleBIServerComponent] [ERROR:1] [] [] [ecid: ] [tid: 7c0] [nQSError: 93001] Can not load library, oracore11.dll, due to, The specified module could not be found.
FYI, AdminTool log file is located at following location:
C:\OBIEE\oraclebi\orainst\diagnostics\logs\OracleBIServerComponent\coreapplication\NQSAdminTool.log
Follow link below for Oracle client:
http://www.oracle.com/technetwork/database/enterprise-edition/downloads/112010-win64soft-094461.html
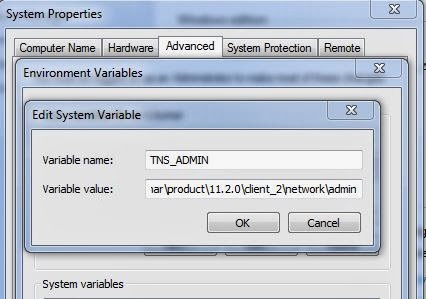
In folder above, create tnsnames.ora file using text editor if not alread present, and add your databases's TNS entry.
4. Create a ODBC connection to your database
Start > Control Panel > Administrative Tools > Data Sources (ODBC) > System DSN > New:
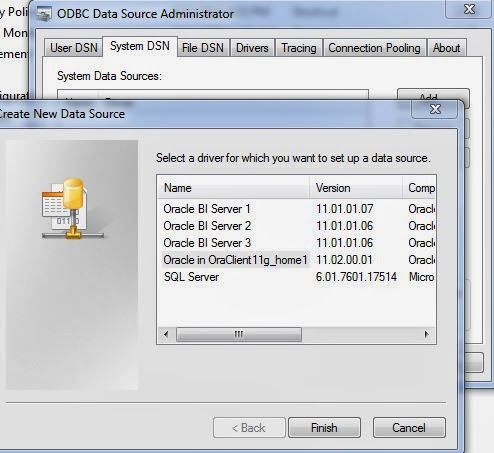
Create new by selecting the just installed client as highlighted above.
Here you should be able to view list of TNS entries that were added to tnsnames.ora file. Provide login and test connection.
5. Now, in RPD, following import metadata wizard:
File > Import Metadata... > and select ODBC 3.5 when asked.
Method 2 - For Oracle databases only (easy method):
1. Click File > Import Metadata...
select connection type as OCI 10g/11g
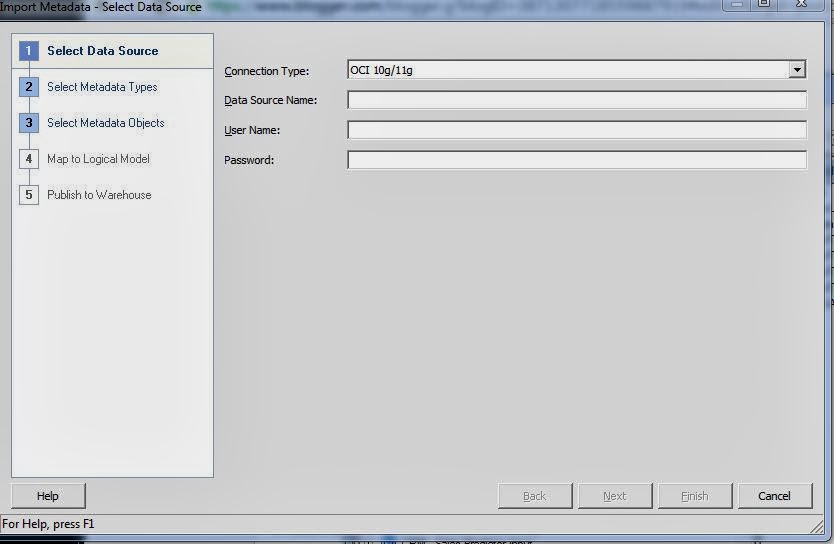
2. In data Source Name, give data base details in the following format:
//hostname:port_number/SID
On the next screen, make sure you uncheck Keys, and only select Tables, as we create joins only on Alias tables created after the import.
That is it. Rest of the steps are straight forward!! Remember, if you dont see your schemas or tables, then probably you need to install full Oracle database client first.
Thanks a lot. It worked successfully.
ReplyDelete